Note: You can deploy your own custom workflows as APIs too, check out the Custom Workflows section for details.
Step 1: Prepare the Workflow
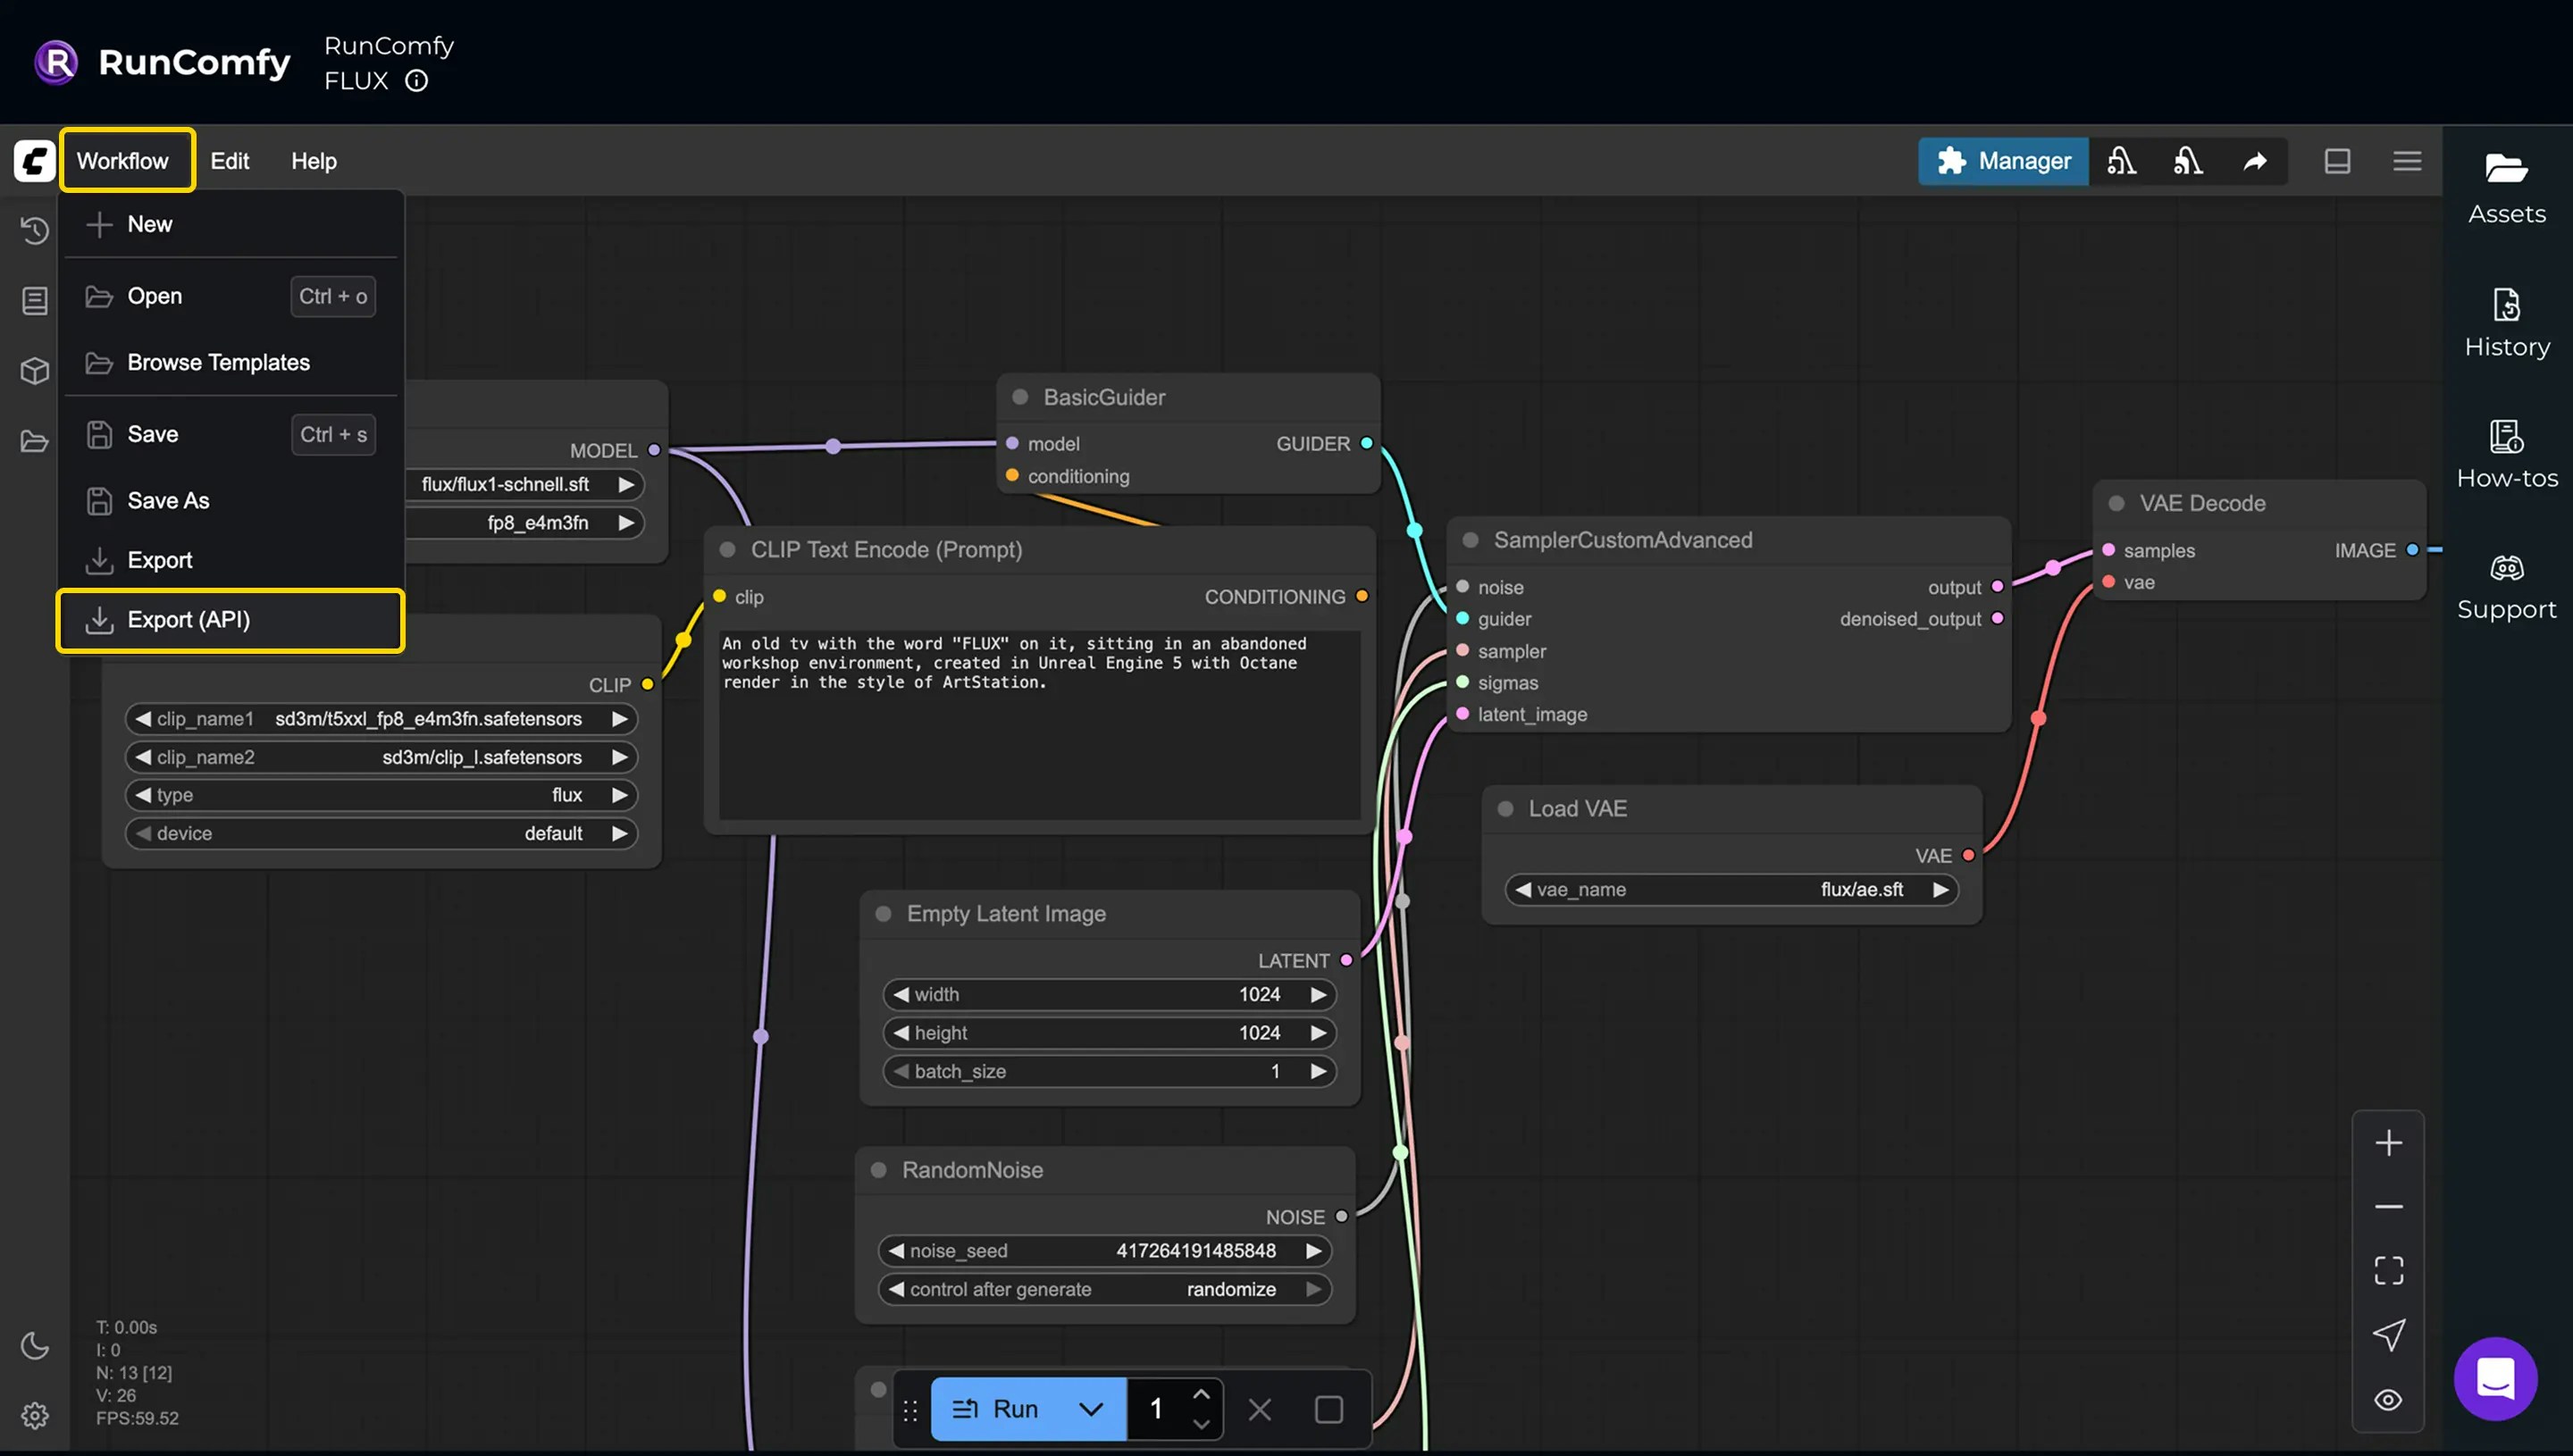
First, visit the RunComfy/FLUX workflow page and click Run Workflow to load it into a machine instance. This action launches a ComfyUI session, which may take up to 5 minutes to initialize. Once the interface loads, queue the workflow to verify it runs successfully. Then, from the Workflow menu in the top-left, select Export (API) to download theworkflow_api.json file, a streamlined version optimized for API use, including node types, inputs, and connections. The exported file will be similar to flux_workflow_api.json. Here you can learn more about workflow_api.json
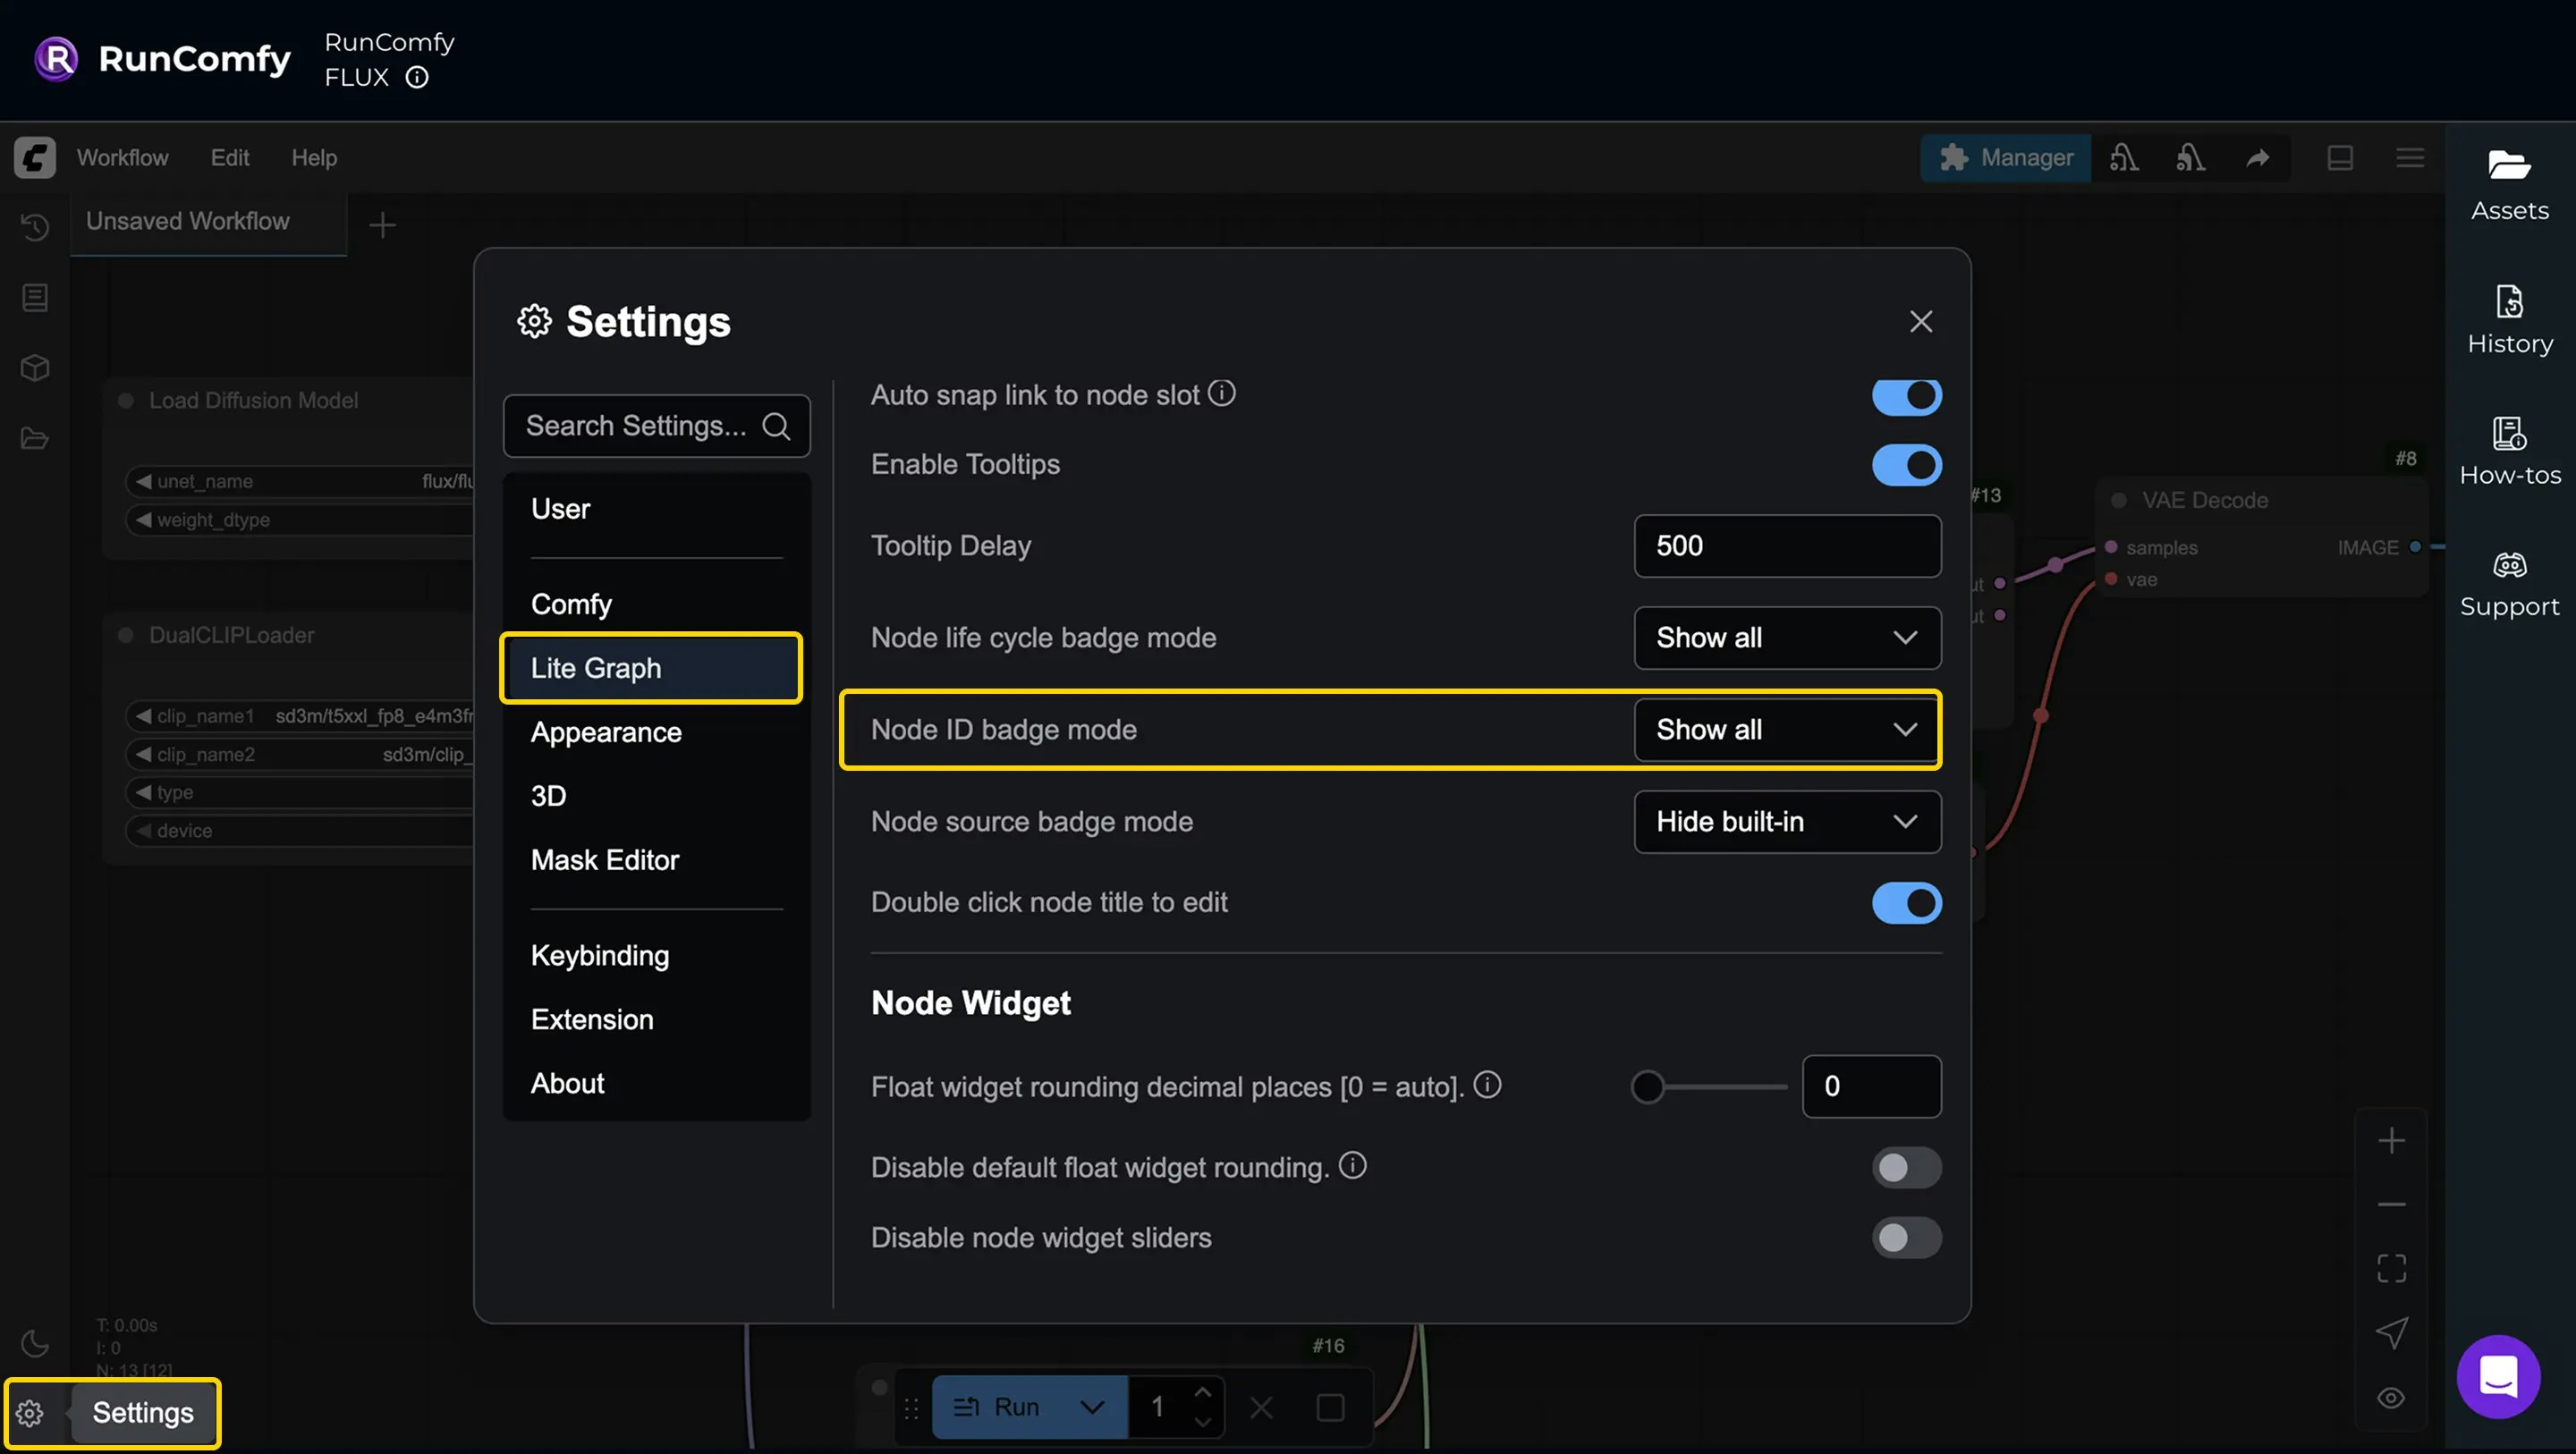
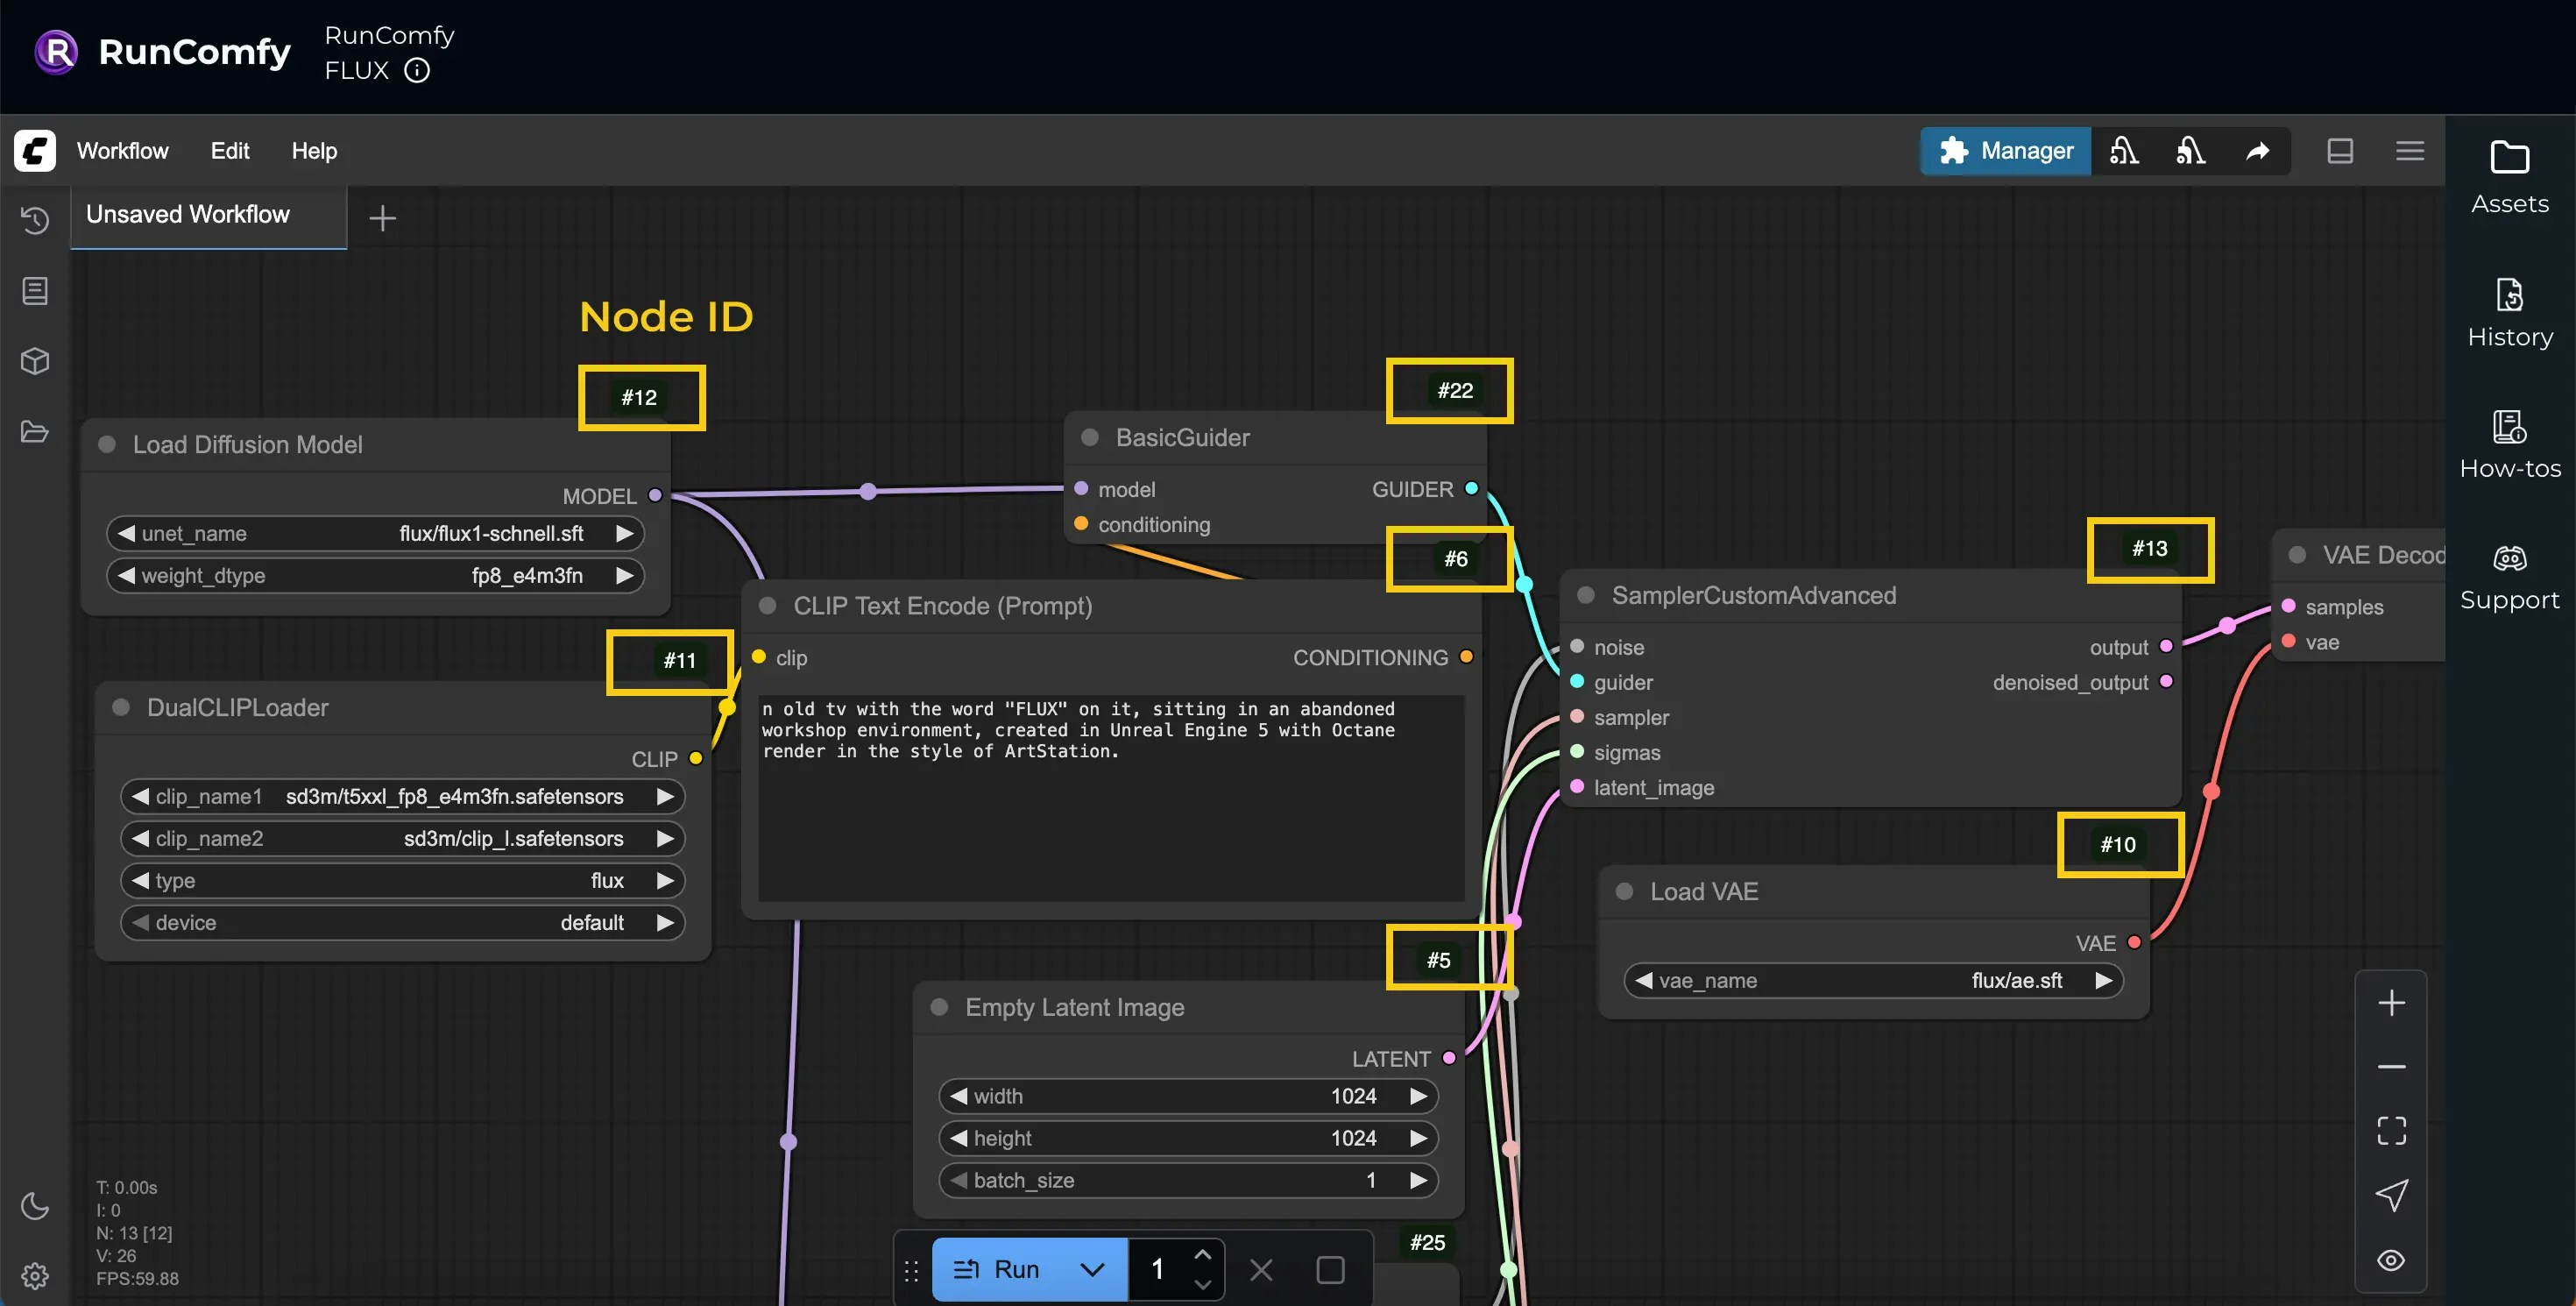
workflow_api.json, start by reviewing it to identify which inputs you want to make dynamic, such as prompt text or noise seed. Since the file uses Node IDs as keys to reference nodes, you’ll need to match these IDs with the corresponding nodes in the ComfyUI interface. To make this easier, open the Settings panel (bottom-left), navigate to Lite Graph, and set Node ID Badge Mode to Show All to display the IDs directly on the UI.
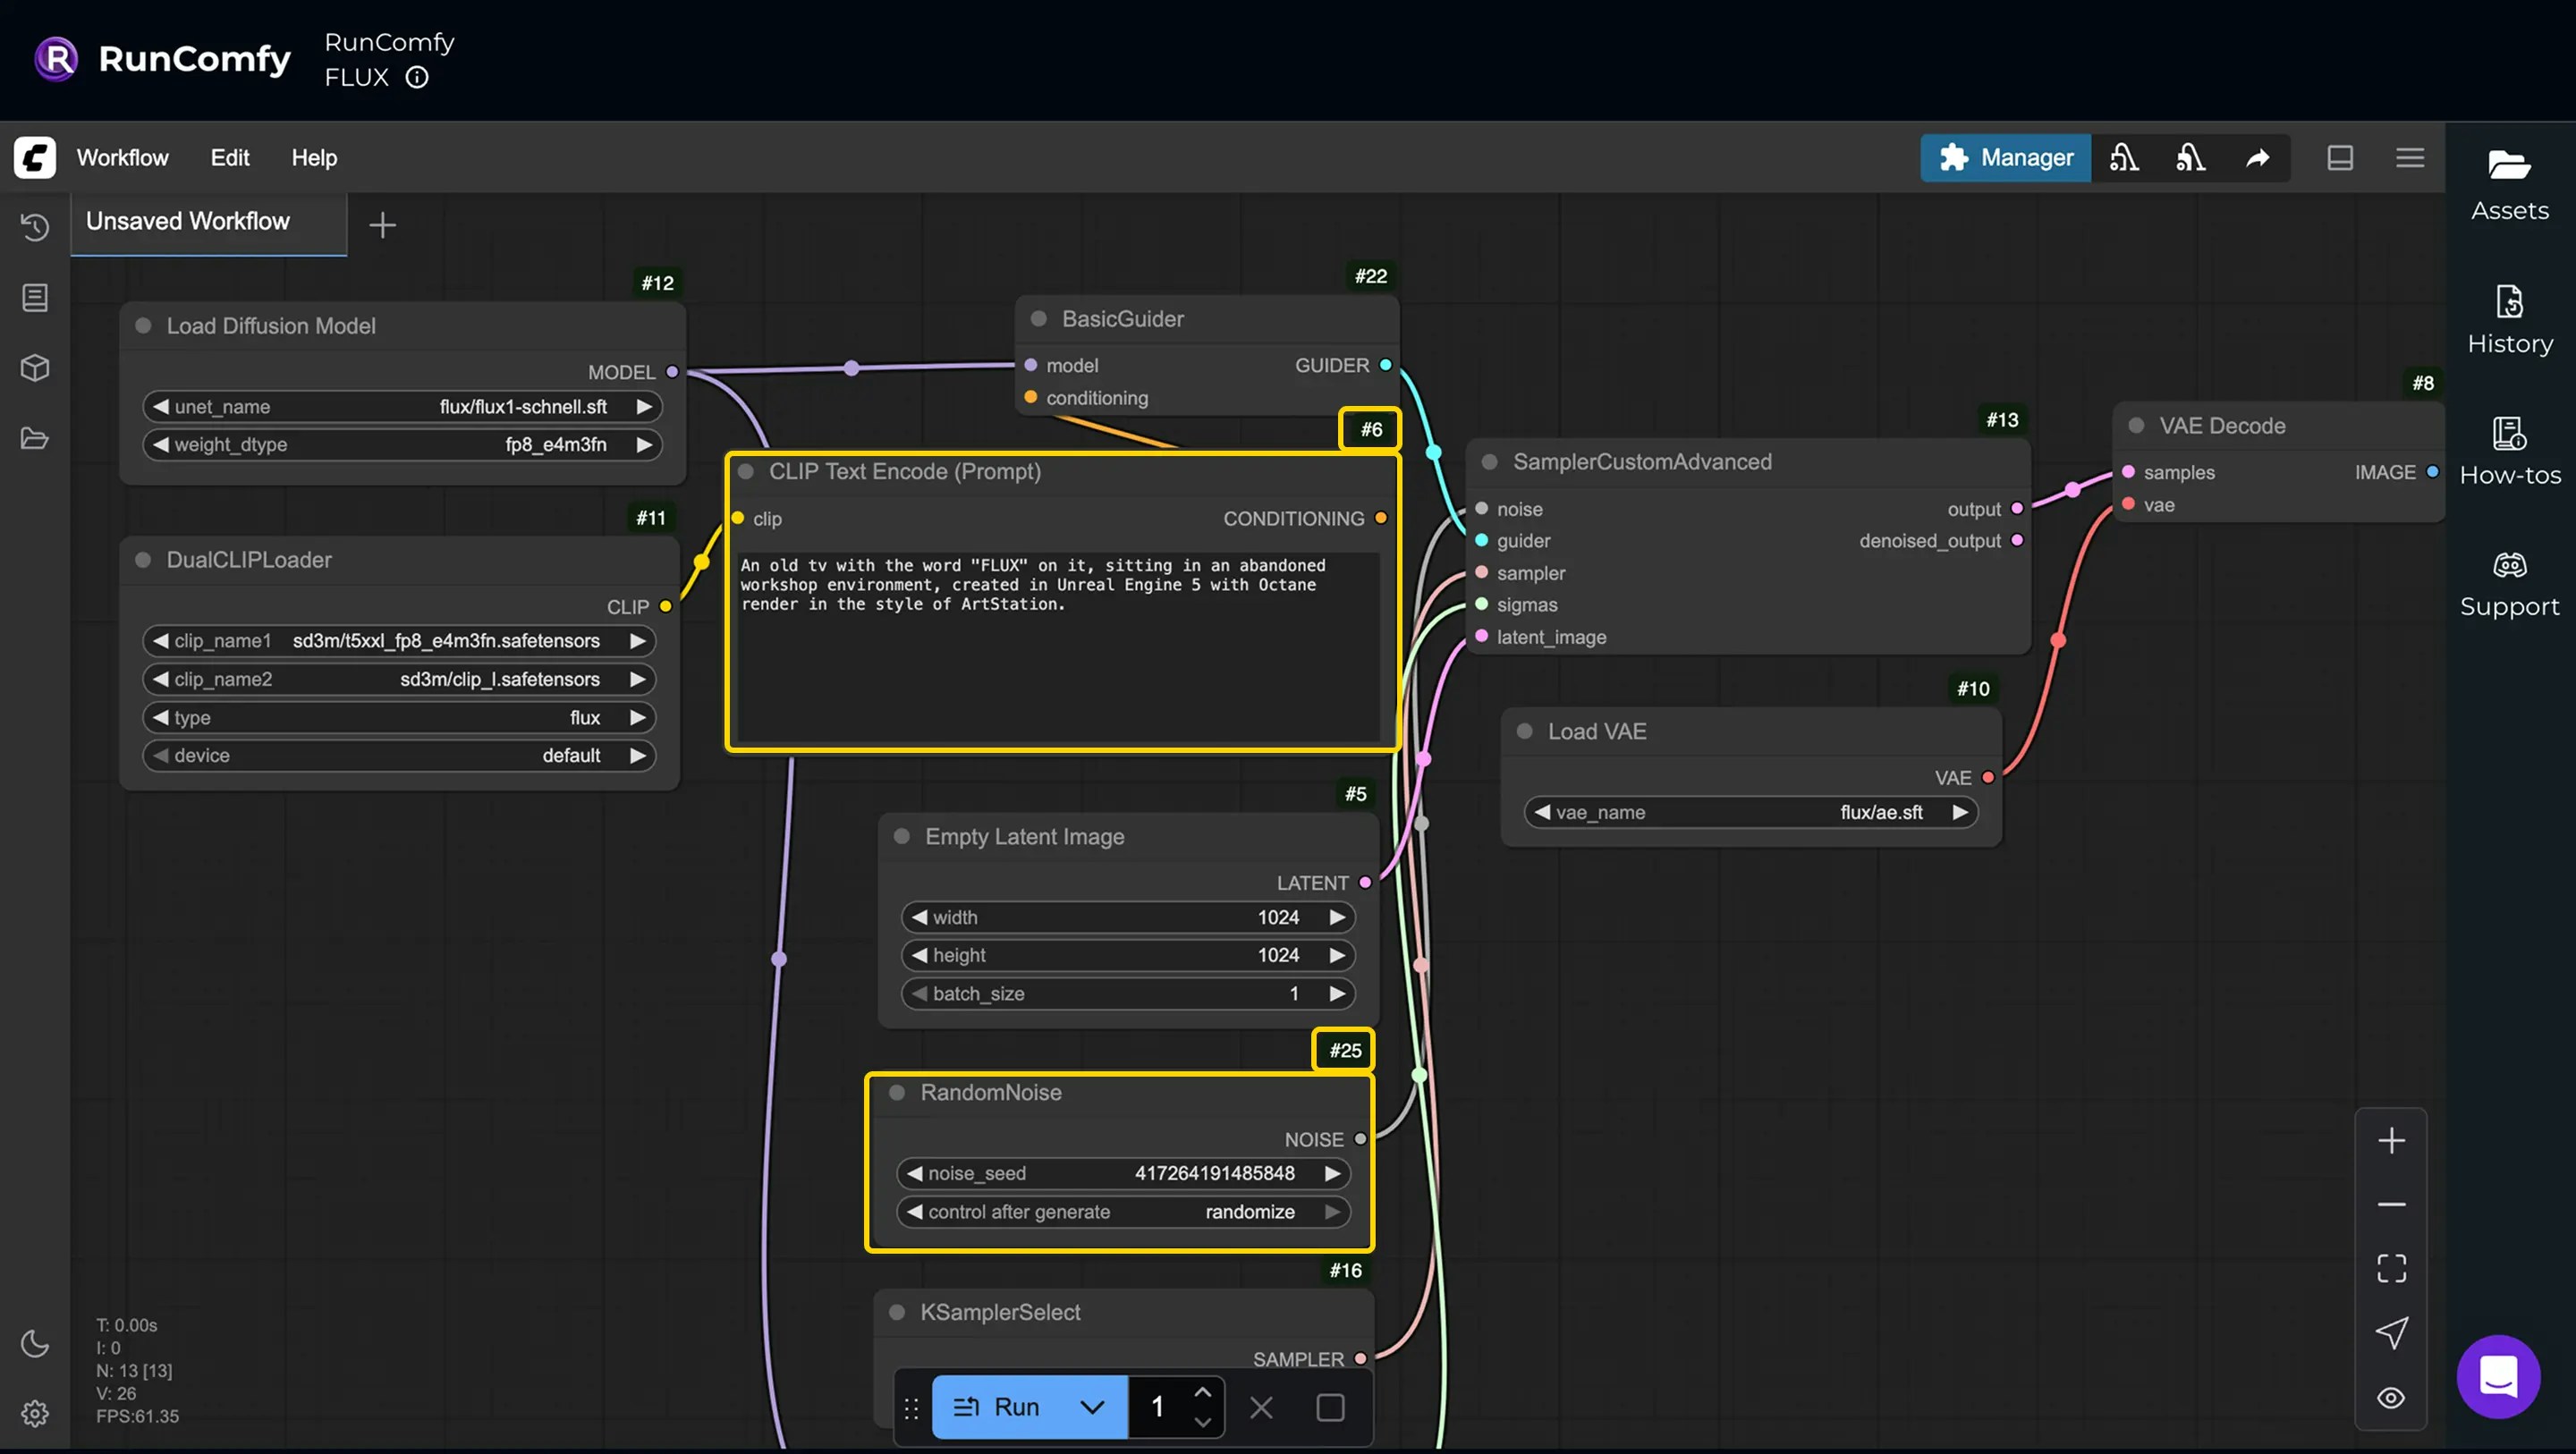
workflow_api.json as the base, so you only need to send an overrides object to customize specific inputs, keeping requests lightweight. Overrides use node IDs from the workflow_api.json to target and update inputs, formatted with node IDs as keys and {"inputs": {key: value}}. For this workflow, begin with the example below. For details, please see Submitting a Request.
Step 2: Deploy Workflow as API
Go to the Deployments page and select Deploy workflow as API. Search for the workflow by its name (RunComfy/FLUX) or ID (00000000-0000-0000-0000-000000001111).
For a quick setup, choose Instant Deploy, which uses default settings like 48GB hardware (A6000) and autoscaling. These settings can be adjusted later if needed.
After the deployment is complete, copy the deployment_id — you’ll need it when making API calls.
Step 3: Authenticate
Click your profile icon (upper-right corner of the RunComfy page) to access the Profile page and find your API key. Include it in every request via theAuthorization: Bearer <your-api-key> header. This secures your calls and helps track usage.
Step 4: Submit a Request
Now it’s time to run your deployed workflow. Send a POST request to the inference endpoint, replacing{deployment_id} with your actual deployment ID. In the request body, include the overrides you prepared in Step 1 under the overrides field. RunComfy will automatically load the stored workflow_api.json for the deployment and apply your overrides on top, customizing specific inputs while using defaults for the rest.
Image/Video Upload
If your workflow’s inputs include an image or video that needs to be uploaded, you can include the media in the overrides object by specifying either a public URL or a Base64 data URI. Refer to the example below (adjust the node ID to match your workflow’s API JSON).Using Public URL
Using Base64 Data URI
Step 5: Monitor and Retrieve Results
After submitting a request, you can track its progress and fetch the outputs once it’s ready. To monitor the job, poll thestatus_url at regular intervals until the status changes to "completed". When the job is complete, use the result_url to retrieve the final outputs.
Check Request Status: